What Is a Dieline in Packaging?

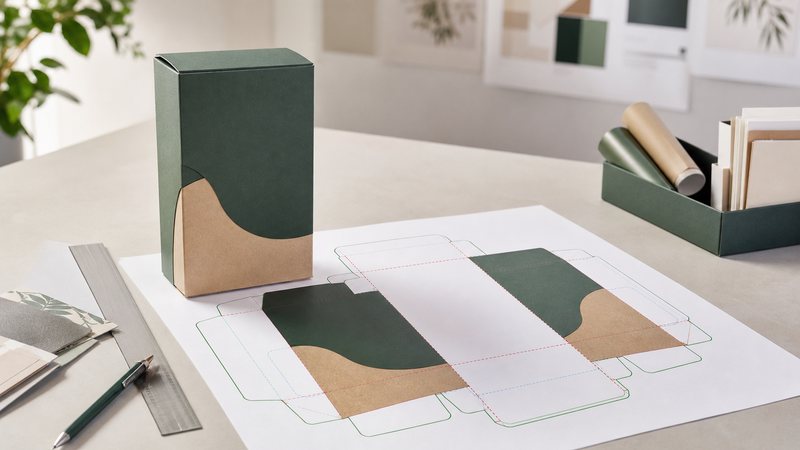
A dieline is the flat technical map behind a box, sleeve, carton, or insert. It tells a printer where material will be cut, creased, glued, and kept clear—so your finished pack does not turn into an expensive paper puzzle.
Die line and dieline mean the same thing. This guide explains how to read one, prepare print-ready artwork, and catch the issues that are much cheaper to fix before production.
What is a dieline in packaging?
A packaging dieline is a flattened structural blueprint. It shows the panels, flaps, glue tabs, cut paths, and fold paths needed to turn a printed sheet into a three-dimensional package. Think of it as the bridge between a designer’s artwork and the converter’s production equipment.
Dieline vs. artwork
The dieline defines where the package goes. Artwork defines what the buyer sees: colours, brand marks, product information, illustrations, and barcodes. A reliable file keeps those jobs separate. Artwork can change during design review; structural lines should not be casually moved, scaled, or redrawn.
Dieline vs. cutting die
A dieline is the digital layout. A cutting die is the physical production tool made to cut, crease, or perforate material. The digital file may guide tooling, but it is not the tool itself. That distinction matters when a box needs a custom window, heavier board, a locking closure, or an insert that has to hold a product securely.
Why a packaging dieline matters
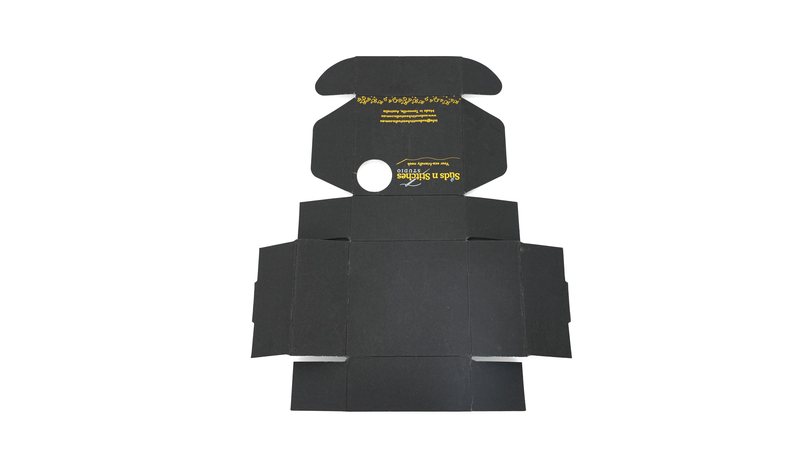
A dieline controls more than a neat box shape. It determines finished dimensions, panel alignment, closure behaviour, material allowance, and the space available for print. A small change to a fold can move a front-panel logo; a shifted glue tab can hide text; a missing bleed can leave a white flash at trim.
It also turns approval into a practical process. Instead of approving a flat screen image alone, the brand team can ask: Which panel faces front? Does the barcode cross a fold? Will an opening tab cover mandatory copy? Does the finished pack still fit the product after board thickness is considered?
How to read dieline lines
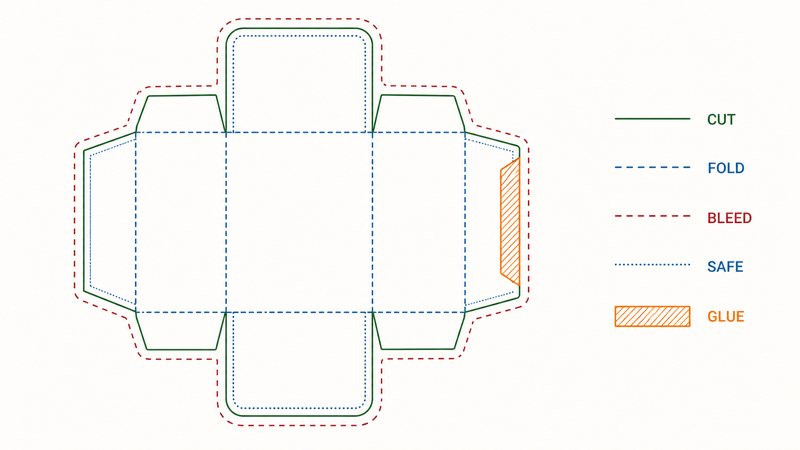
Line colours and names vary by supplier and software, so the manufacturer’s key always wins. Still, most packaging dielines contain the same working language.
| Marker | What it controls | Artwork rule |
|---|---|---|
| Cut or trim line | The final outer shape | Extend backgrounds past it; keep critical copy inside. |
| Fold or crease line | Where the board bends | Avoid placing small type or barcode bars across it. |
| Bleed line | Extra printed area beyond trim | Run background colour and images through it. |
| Safe zone | Protected area for important content | Keep logos, legal copy, and key type inside. |
| Glue tab | Where panels bond | Do not place essential graphics there unless approved. |
| Perforation | A controlled tear or detachable section | Check both opening direction and copy placement. |
Bleed is not decoration. It is the artwork beyond the final trim area that gives production a tolerance for movement. Adobe describes bleed as artwork outside the crop or trim area; the required amount depends on the production method, so use the printer’s stated value rather than assuming one universal number. Adobe’s print-bleed guidance is useful background, but your approved dieline is the operating instruction.
Five common dieline errors—and what they cause
- Missing bleed: a background can finish short of the trim and create an unintended white edge.
- Text outside the safe zone: small legal copy, a logo, or a campaign line may be cropped or sit uncomfortably close to an edge.
- Artwork on the wrong panel: a front design can become upside down after folding, or land beneath a flap.
- Edited structural paths: changing a cut, crease, or glue tab can alter fit, closure, and die-cut tooling assumptions.
- Flattened working files: a rasterised or uneditable file makes it harder to check lines, fonts, image quality, and last-minute corrections.
The most expensive problem is rarely “a bad-looking PDF.” It is a production-approved file that was never checked in its folded state. For retail packaging, barcode placement needs the same discipline: GS1 advises keeping symbols and quiet zones away from folds, seams, edges, flaps, and other scanning obstacles. See GS1’s barcode placement guidance before treating a flat panel as automatically scan-safe.
Who creates and approves a dieline?
For a standard carton, a packaging manufacturer commonly supplies the production-approved template. For a custom pack, a structural packaging designer develops the format around product dimensions, material, closure, insert, and handling needs. The graphic designer then places artwork on that approved structure. The brand owner’s job is to approve content, orientation, and commercial requirements—not to guess at die-cut allowances.
A clean workflow is: confirm the product and required protection; receive the current dieline; add artwork on separate layers; review the supplier proof; test a prototype or full-size mock-up; then approve the production file. If dimensions or material change, restart the structural review. An old template is not “close enough” when fit is critical.
Die-Cut Packaging: From Flat Artwork to a Real Production Check
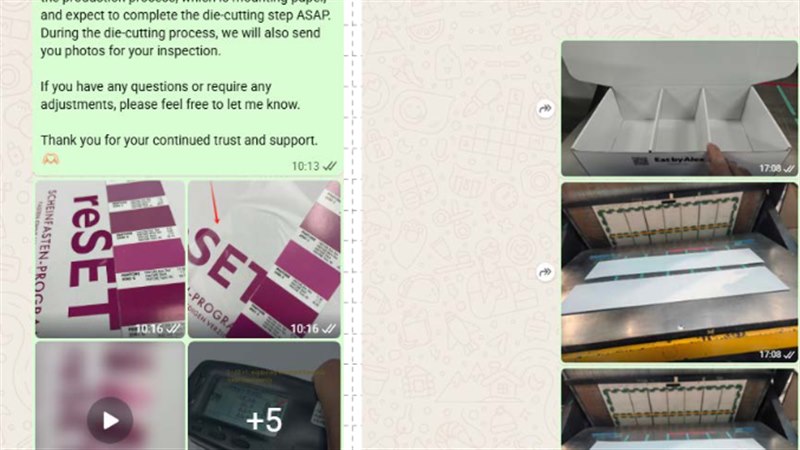
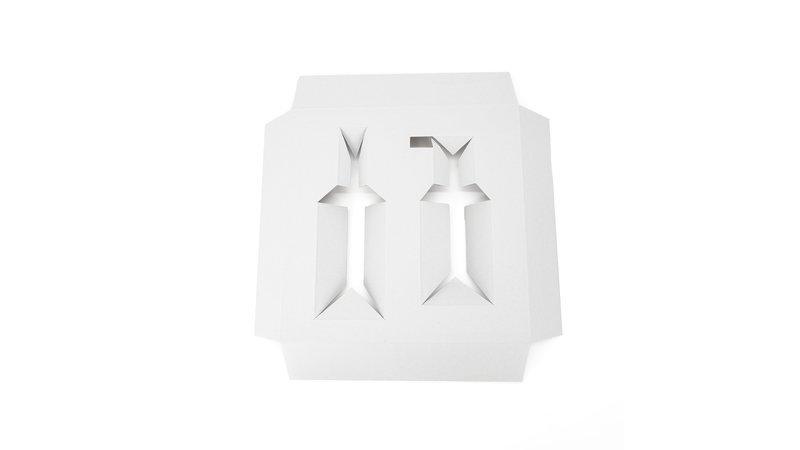
This health-product packaging project involved a die-cut structure. Its useful lesson is simple: approving a flat dieline on screen is only the first step. The structure still needs to be checked as a real paperboard sample.
“The artwork looks correct.”
“The cut, fold, opening, and paperboard structure work in a real sample.”
A dieline becomes useful only when the flat file is checked against a real die-cut sample. Reviewing white paperboard samples and production-stage photos can reveal issues with cut paths, fold positions, openings, or fit while changes are still simple.
Dieline → white sample → first die-cut check → production photos → final production approval.
How to prepare artwork on a dieline
Use editable vector software such as Adobe Illustrator, or the application your supplier specifies. Keep the dieline on a locked, non-printing layer and artwork on its own layers. Use CMYK only when your printer requests it; check image resolution, font handling, spot colours, varnish or foil layers, and the required PDF or AI export settings before sending the file.
Do not delete line markers simply because they look untidy in the design. Ask which layers should be non-printing and which production marks the supplier needs. When saving a PDF, retain the required bleed settings; Adobe’s PDF options reference explains how bleed information can be included in output.
Standard template or custom dieline?
A standard template is efficient when the product fits a common box size, protection demands are modest, and no unusual window, insert, or closure is required. It is often a sensible starting point for regular folding cartons, sleeves, and simple mailers.
Use a custom dieline when product dimensions are unusual, board thickness affects fit, a product needs immobilising, or the pack includes windows, tear strips, inserts, or complex locking tabs. For example, a die-cut insert needs to be reviewed with the actual product—not only its nominal dimensions—because retention and removal must both work.
Dieline examples by packaging type
Folding cartons usually show front, back, side panels, tuck flaps, dust flaps, and a glue tab. The main artwork question is orientation: a front panel may look correct when flat but become inverted or partly hidden after the carton is folded.
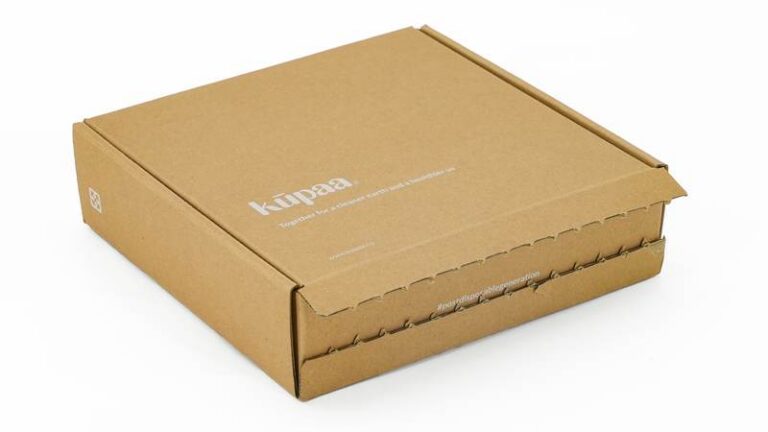
Corrugated mailer boxes have larger panels, locking tabs, and scored folds that need to survive repeated opening. Their dielines should be checked alongside product weight and the intended shipping journey, not only against a polished 3D rendering.
Sleeves are structurally simple but unforgiving in alignment: the seam, opening edge, and inside-versus-outside artwork must be clear. Rigid boxes may require separate layouts for wrapped board, lids, trays, and inserts rather than one single flat outline.
Labels and pouches can add seal zones, tear notches, registration marks, or product-clear areas. The principle stays the same: identify every non-printing, sealing, folding, or cutting zone before artwork is approved.
Use one approved dieline as the source of truth
A dieline is not a one-time sketch. It is a controlled production document. Keep the approved version, revision date, finished dimensions, material assumptions, and named contact together so designers, buyers, and suppliers are reviewing the same file. If the structure changes, even by a small amount, ask for an updated dieline before moving old artwork onto the new layout.
This simple discipline prevents a common handoff problem: the artwork looks approved, but it was built on an earlier version with a different glue flap, insert opening, or panel width. A clean filename and a final PDF proof are inexpensive safeguards against avoidable rework.
What I check before approving a dieline
First, I compare the finished dimensions with the physical product, including caps, cables, secondary packs, and any part that protrudes. Next, I print the dieline at 100% scale, cut it out, and fold it. This quick paper mock-up exposes upside-down panels, hidden copy, awkward opening tabs, and missing clearance surprisingly well.
Then I check the non-obvious zones: text near trims or creases, graphics crossing folds, barcodes and regulatory copy, glue areas, windows, and insert openings. Finally, I compare the artwork file with the supplier’s latest version of the dieline. The latest file matters more than a template saved six weeks ago in someone’s downloads folder.
Print-ready dieline checklist
- Finished dimensions match the product and pack-out.
- The dieline is the manufacturer’s latest approved version.
- Artwork and structural lines are separated; technical layers remain editable.
- Bleed and safe zones follow the supplier specification.
- Fonts, images, colours, and required print layers are prepared correctly.
- Barcodes are placed away from folds, seams, and opening features.
- Cut, crease, glue, perforation, and window paths have not been changed.
- A digital proof and, where risk warrants it, a physical sample have been reviewed.
From dieline to production-ready packaging
A dieline is not an abstract designer file. It is the structural instruction that connects your artwork to a real package. The practical answer to what is a dieline in packaging is simple: it is the flat plan that tells every panel where to print, fold, cut, and bond.
Use a standard template when the structure truly fits. Request a custom review when product fit, protection, or brand presentation depends on it. In both cases, let the supplier’s approved specification lead, then validate it with a proof or prototype before bulk production.
FAQs
Is a dieline the same as a packaging template?
The terms are often used loosely, but a production dieline is more specific. It should show the structural paths and the supplier’s requirements for cut, fold, bleed, safe area, glue, and any special features.
Can I create a dieline in Adobe Illustrator?
Illustrator is widely used to place packaging artwork. A structural designer or manufacturer should create or approve the final production dieline, especially where material, tooling, protection, or fit are involved.
How much bleed should a packaging dieline include?
Three millimetres is a common example, but it is not a universal rule. Use the bleed stated on your printer’s current template and ask before changing it.
Should dieline lines print on the finished package?
Usually no. They are production guides kept on a non-printing layer, but the exact layer setup and file-delivery rules come from the supplier.
Do I still need a sample after approving a dieline?
For custom, fragile, fitted, or high-value packaging, yes. A physical sample verifies real material behaviour, product fit, closure performance, and how artwork reads after folding.
Need a dieline reviewed before production?
Forests Packaging Group can review packaging dimensions, structure, artwork placement, and practical production assumptions as part of a custom packaging enquiry. Explore our custom packaging formats, see how our Intelligent Factory supports controlled production workflows, or prepare a design brief with product size, artwork, quantity, destination, and deadline.
Send your file or starting requirements through our packaging quote request. We will help identify whether you need a standard template, a custom dieline, a sample, or a production-ready artwork review.
Send Your Packaging Brief to Our Team
Share your product type, format, size, quantity, material, destination, and required date. Our team can support artwork review, sampling, production, inspection, and export coordination.
Contact us for a project-specific recommendation.
Ready to build packaging with a factory team?
Send your product size, material, artwork, quantity, destination, and deadline so our team can focus the first review on quotation and sampling.