What Is the Opposite of Embossed? Embossing vs Debossing

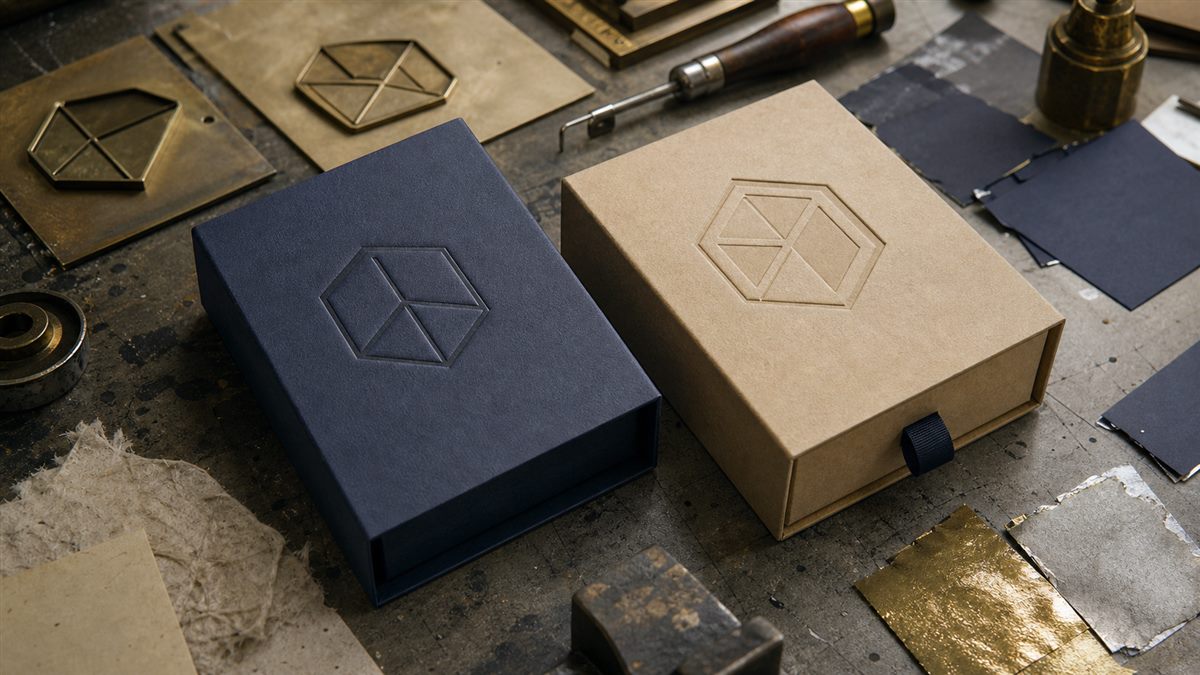
Quick answer: The opposite of embossed is debossed. Embossing pushes a logo or pattern up from the paperboard; debossing presses it into the surface. Both can add a quiet, premium feel to packaging, but the better choice depends on the board, artwork, viewing distance, foil, and how the box will be handled.
What Is the Opposite of Embossed?
If a mark stands above the surrounding surface, it is embossed. For brands comparing finishes with a custom packaging manufacturer, the physical board sample matters more than a screen preview. If the same mark is pressed below the surface, it is debossed. That is the simple answer behind the search term opposite of embossed, but packaging decisions are rarely that simple. The depth, board construction, artwork, and lighting all affect what a customer actually sees.
| Finish | What happens to the board | Typical visual effect | Works well for |
|---|---|---|---|
| Embossing | The design is raised | Light catches the high point and edge | Logos, seals, short headlines, tactile brand marks |
| Debossing | The design is pressed inward | Shadow sits inside the mark | Quiet luxury, natural papers, recessed icons, blind finishes |
On a screen, the two finishes can look almost identical. In the hand, they are not. Embossing feels like a small ridge or relief. Debossing feels like a pocket or channel. A sample viewed under flat office lighting may hide both effects, so final approval should include a physical sample and a quick check under angled light.
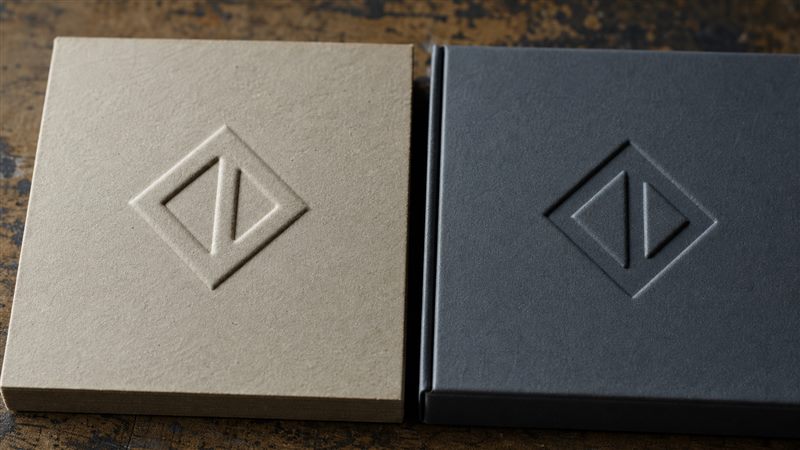
Embossing vs Debossing for Packaging
The choice is usually made at the brand-mark stage. The right direction can also depend on the product category and presentation goal, so it helps to review relevant packaging applications before locking the artwork. A raised symbol attracts the fingers and gives a rigid box a more pronounced presentation. A recessed mark is often calmer. It lets the paper, coating, or foil carry more of the visual work without making the surface feel busy.
There is no universal winner. A thin folding carton with a very small line drawing may not hold a deep relief cleanly. A thick rigid box may accept either finish, but its corner, wrap, and inner board still need to be checked. Packaging that looks impressive on a flat proof can lose definition after folding, wrapping, or transportation.
Which Finish Is Better for a Logo?
Use the brand’s personality as the starting point, then test the mark at its real size. Embossing is a strong fit when the logo needs to be noticed as soon as the box is picked up. Debossing suits brands that want a more restrained mark, especially on uncoated, recycled, or textured stocks.
- Choose embossing when the logo has a clean silhouette, enough open space, and a clear tactile role.
- Choose debossing when the brand wants depth without a bright raised edge or when a recessed mark fits the natural character of the paper.
- Test both when the finish is part of a new launch. Two small samples often settle the question faster than a long email thread.
Blind Finish, Foil, or Both?
A blind emboss or blind deboss has no ink or foil in the finished mark. The shape is created only by pressure and the change in surface. It is subtle, which can be exactly right for a premium sleeve, invitation-style box, or uncoated paper label.
Foil can be added to the high or low area, but registration matters. For a concise explanation of the transfer process and finish options, see this foil stamping packaging guide. Gold foil over an embossed logo can make the relief more obvious. A recessed foil mark can look quieter and more controlled. Metallic film also reflects differently on coated and uncoated board, so the foil swatch should be checked on the actual material rather than selected from a screen.
Materials and Artwork Limits
Paperboard, coated stock, specialty papers, and rigid-box wraps can all be suitable, but they do not behave in the same way. A useful paperboard finishing reference explains why substrate construction changes the result. Board thickness, fiber direction, coating, lamination, and the distance between the finish and a fold or cut edge affect the result. More pressure is not a substitute for the right construction.
Artwork should be supplied as vector paths where possible. Very fine lines, tight counters, tiny type, and large solid areas need a production review. A small letter may close up when pressed. A large solid panel may show more stress or a visible halo around the edge. Keeping the relief away from score lines and sharp corners usually gives the factory more room to control the sample.
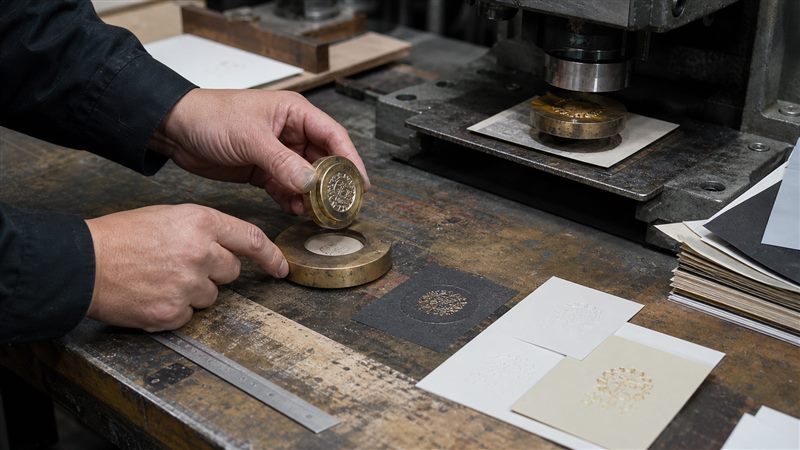
How the Finish Is Made
- The artwork is checked for line weight, open areas, and its position on the dieline.
- A metal die is produced for the raised or recessed form, with a matching counter-die where the construction requires it.
- The press is set up and pressure is adjusted against the actual board or wrap material.
- Foil, ink, or coating is added if the design calls for it.
- The sample is inspected for depth, edge definition, registration, cracking, and the effect of folding.
That last step is where many avoidable problems are found. Designers who need a practical file-preparation checklist can also review this emboss and deboss setup guide. The sample should be opened, folded, stacked, and viewed from the distance at which a customer will see it. A finish that looks sharp on a flat sheet may sit too close to a crease once the box is assembled.
What Changes the Cost?
Embossing is not automatically more expensive, and debossing is not automatically cheaper. The cost usually comes from the die, the number of finished surfaces, press setup, foil or ink, material choice, artwork complexity, and order quantity. A simple mark on one panel may be straightforward. Multiple dies, tight registration, a foil pass, and several box sizes add work regardless of which direction the mark moves.
For an accurate quote, send the supplier the assembled box size, board or wrap material, flat dieline, finish location, artwork, foil requirement, quantity, and delivery date. Ask whether the quoted price includes a physical proof and whether a new die is required for each size or design.
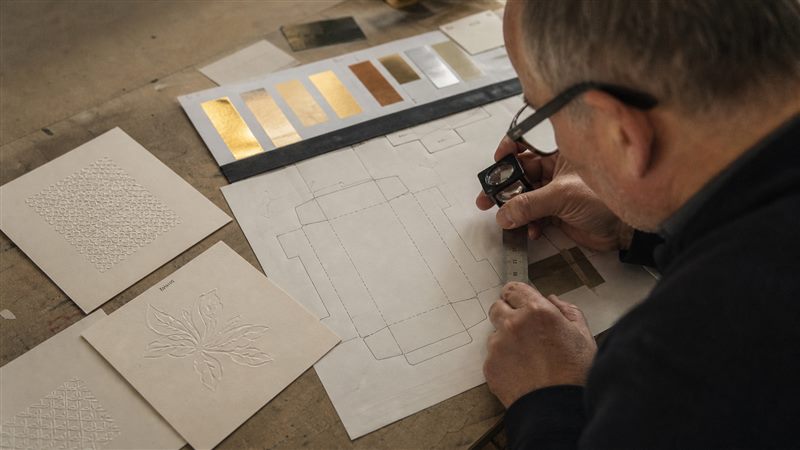
A Practical Sample Check Before Approval
In production, the most useful comparison is not “which one looks more luxurious?” It is “which one still reads correctly on the finished package?” Check the sample in five ways:
- Run a finger across the mark and confirm that the raised or recessed effect is clear.
- Hold the sample under angled light, then under normal store or office light.
- Inspect small type and counters with a loupe or phone camera.
- Fold and assemble the carton to check the finish near scores, seams, and corners.
- Compare foil color, registration, and edge cleanliness against the approved reference.
Common Mistakes to Avoid
The first mistake is choosing from a digital mockup alone. The second is placing the finish too close to a fold or cutting line. Another is sending artwork with very small details and assuming pressure will make them clearer. It will not. Finally, do not approve a beautiful flat sample before checking the assembled box, the packing process, and the lighting in which it will be displayed.
Match the Finish to the Buying Moment
A package does not live in one viewing situation. It may be seen on a shelf, in a parcel, under a shop light, or in a customer’s hands at home. Embossing can help a plain box catch a passing highlight, while debossing may be easier to appreciate when someone turns the pack over and feels the mark. If the package will be photographed often, test the finish with the same type of light used for product images. Strong side light can exaggerate relief; flat light can make a subtle deboss nearly disappear.
Think about the rest of the design, too. A busy printed carton may need a restrained blind deboss so the surface does not compete with the artwork. A mostly unprinted rigid box may benefit from an embossed seal or a small foil detail. The finish should give the customer one clear point to notice, not turn every panel into a special effect.
Questions to Put in the RFQ
A good request for quotation makes the comparison easier for everyone. State whether you want a raised or recessed mark, but also describe what must remain consistent: logo size, position, depth impression, foil color, and the acceptable appearance after assembly. If the same artwork will appear on several box sizes, list them separately. One die may not suit every panel or scale.
- What board or wrap material will be used, and is it coated, laminated, or textured?
- Will the mark sit near a score, fold, seam, handle, or cut edge?
- Is the finish blind, foil-stamped, printed, or a combination?
- What physical sample will be supplied before the production run?
- How will the factory check depth, registration, cracking, and color?
- Are tooling, setup, sampling, and repeat-order costs shown separately?
These questions also reveal how a supplier works. A response that only gives a unit price leaves important risk unpriced. A useful response explains the material assumption, proof route, tooling, likely production constraint, and what the customer needs to approve. That is especially important when a debossed or embossed detail is central to the unboxing experience.
How to Choose an Opposite of Embossed Packaging Supplier
Look for a supplier that can discuss the whole package, not just the finishing machine. It is also worth reviewing a supplier’s packaging blog to see whether its recommendations cover materials, production, and inspection—not only finished photos. They should review board construction, dieline placement, artwork, foil, assembly, and the intended handling route. Ask to see comparable physical samples, confirm the proof process, and make sure the quote identifies tooling and setup instead of hiding them inside a single unit price.
For a custom opposite of embossed project, the best supplier conversation is specific: “Here is the mark, here is the board, here is the fold, and here is the way the box will be handled.” That gives the factory enough information to recommend embossing, debossing, or a simpler printed finish with a clear reason.
FAQs
What is the opposite of embossed?
The opposite of embossed is debossed. Embossing raises a design above the surface; debossing presses it into the material.
Is debossing better than embossing for packaging?
Neither is always better. The right option depends on the artwork, board, fold position, desired tactile effect, foil, quantity, and handling conditions.
Can embossing and debossing be combined with foil?
Yes. Foil can be registered to a raised or recessed mark, but the sample should be checked for edge definition, color, and registration on the actual packaging material.
Does embossing work on recycled paperboard?
It can, but recycled fibers, surface texture, thickness, and coating influence the result. A physical proof is the safest way to confirm depth and edge quality.
What should I send a supplier for an embossing quote?
Send the dieline, assembled dimensions, material, artwork, finish location, foil or ink requirements, quantity, box style, and delivery date. Also ask whether tooling and a physical proof are included.
Need help choosing between embossed and debossed packaging? You can request a packaging quote with the dieline, material, artwork, and target quantity. Share your dieline, material, artwork, and target quantity. A packaging supplier can then recommend a finish based on the finished box rather than a screen mockup.
Conclusion
The opposite of embossed is debossed, but the real decision is about how the finished package should feel and read. Embossing brings a mark forward. Debossing draws it inward. Test both on the final material, at the final size, after folding, and under realistic light. That short proofing step protects the brand experience and keeps a decorative finish from becoming a production problem.
Send Your Packaging Brief to Our Team
Share your product type, format, size, quantity, material, destination, and required date. Our team can support artwork review, sampling, production, inspection, and export coordination.
Contact us for a project-specific recommendation.
Ready to build packaging with a factory team?
Send your product size, material, artwork, quantity, destination, and deadline so our team can focus the first review on quotation and sampling.